
Where Are My Zoom Recordings Saved? 3 Key Locations to Check
Have you ever wrapped up a Zoom meeting and found yourself puzzled, wondering, “Where did my Zoom recording go?” If you’re new to Zoom or just need a brief reminder, this comprehensive guide will walk you through exactly where to find your Zoom recordings and how to access them effortlessly. Whether you’re using Zoom for work, school, or personal projects, knowing how to locate your meeting recordings is crucial for staying organized and productive.
In this article, we’ll not only show you the three main places where Zoom recordings are stored but also explain how to customize their save location to streamline your workflow. Say goodbye to wasting time searching for video recordings across your device or the cloud!
Contents
- 1 Boost Your Meeting Management with MeetGeek
- 2 How to Find Zoom Recordings: 3 Essential Places
- 3 Finding Zoom Recordings on a Mac or PC
- 4 How to Access Zoom Cloud Recordings
- 5 Accessing Zoom Recordings via the Zoom App
- 6 How to Play Zoom Meeting Recordings
- 7 How to Share Zoom Meeting Recordings
- 8 How to Download Zoom Meeting Recordings
- 9 How to Change Your Zoom Recording Storage Location
- 10 Automate Your Zoom Recordings with MeetGeek
- 11 Zoom Recording FAQs
Boost Your Meeting Management with MeetGeek
Looking for a smarter way to handle your meeting recordings and keep critical discussions at your fingertips? MeetGeek, an AI-powered meeting automation tool, takes the hassle out of managing Zoom recordings. With features like automated transcription, meeting summaries, and seamless organization, MeetGeek ensures your meeting insights are always accessible. Best of all, you can try it for free! Compare it to tools like Microsoft Teams or Google Meet, which also offer recording features, but MeetGeek stands out for its AI-driven insights and ease of use.
Whether you’re archiving business meetings, saving study sessions, or building a personal video library, mastering Zoom recording locations is a game-changer. Let’s dive into the details and ensure you never lose track of your virtual meetings again!
How to Find Zoom Recordings: 3 Essential Places
Locating your Zoom recordings is straightforward once you know the right spots to check. Whether you’ve saved them locally on your computer or in the Zoom Cloud, here’s where to look.
1. Local Storage: Your Computer’s Default Folder
By default, Zoom saves recordings to a designated folder on your computer, making them easily accessible without an internet connection. This is especially handy for users on free Zoom plans, as all recordings are stored locally.
2. Zoom Cloud Storage: Access Anywhere
If you have a paid Zoom plan, you can opt to save recordings to the Zoom Cloud, allowing you to access them from any device with an internet connection. Simply log into your Zoom account and head to the Recordings section to find them.
3. Zoom App: Direct Access
The Zoom desktop app offers a convenient way to view both local recordings and cloud recordings directly within the platform, perfect for quick access during your workday.
Note: If you’re on a free Zoom plan, your recordings will only be saved locally. With a paid plan, you gain the flexibility to choose between local storage and cloud storage and even customize the default save location to suit your needs.
Let’s explore each of these options in detail and learn how to tweak your Zoom recording settings for maximum efficiency.
Finding Zoom Recordings on a Mac or PC
Local Zoom recordings, which are saved directly to your computer’s hard drive, are available to all Zoom users, whether you’re on a Mac, Windows, or Linux system. These recordings are perfect for offline access and don’t require a paid subscription.
Steps to Locate Zoom Recordings on Your Computer
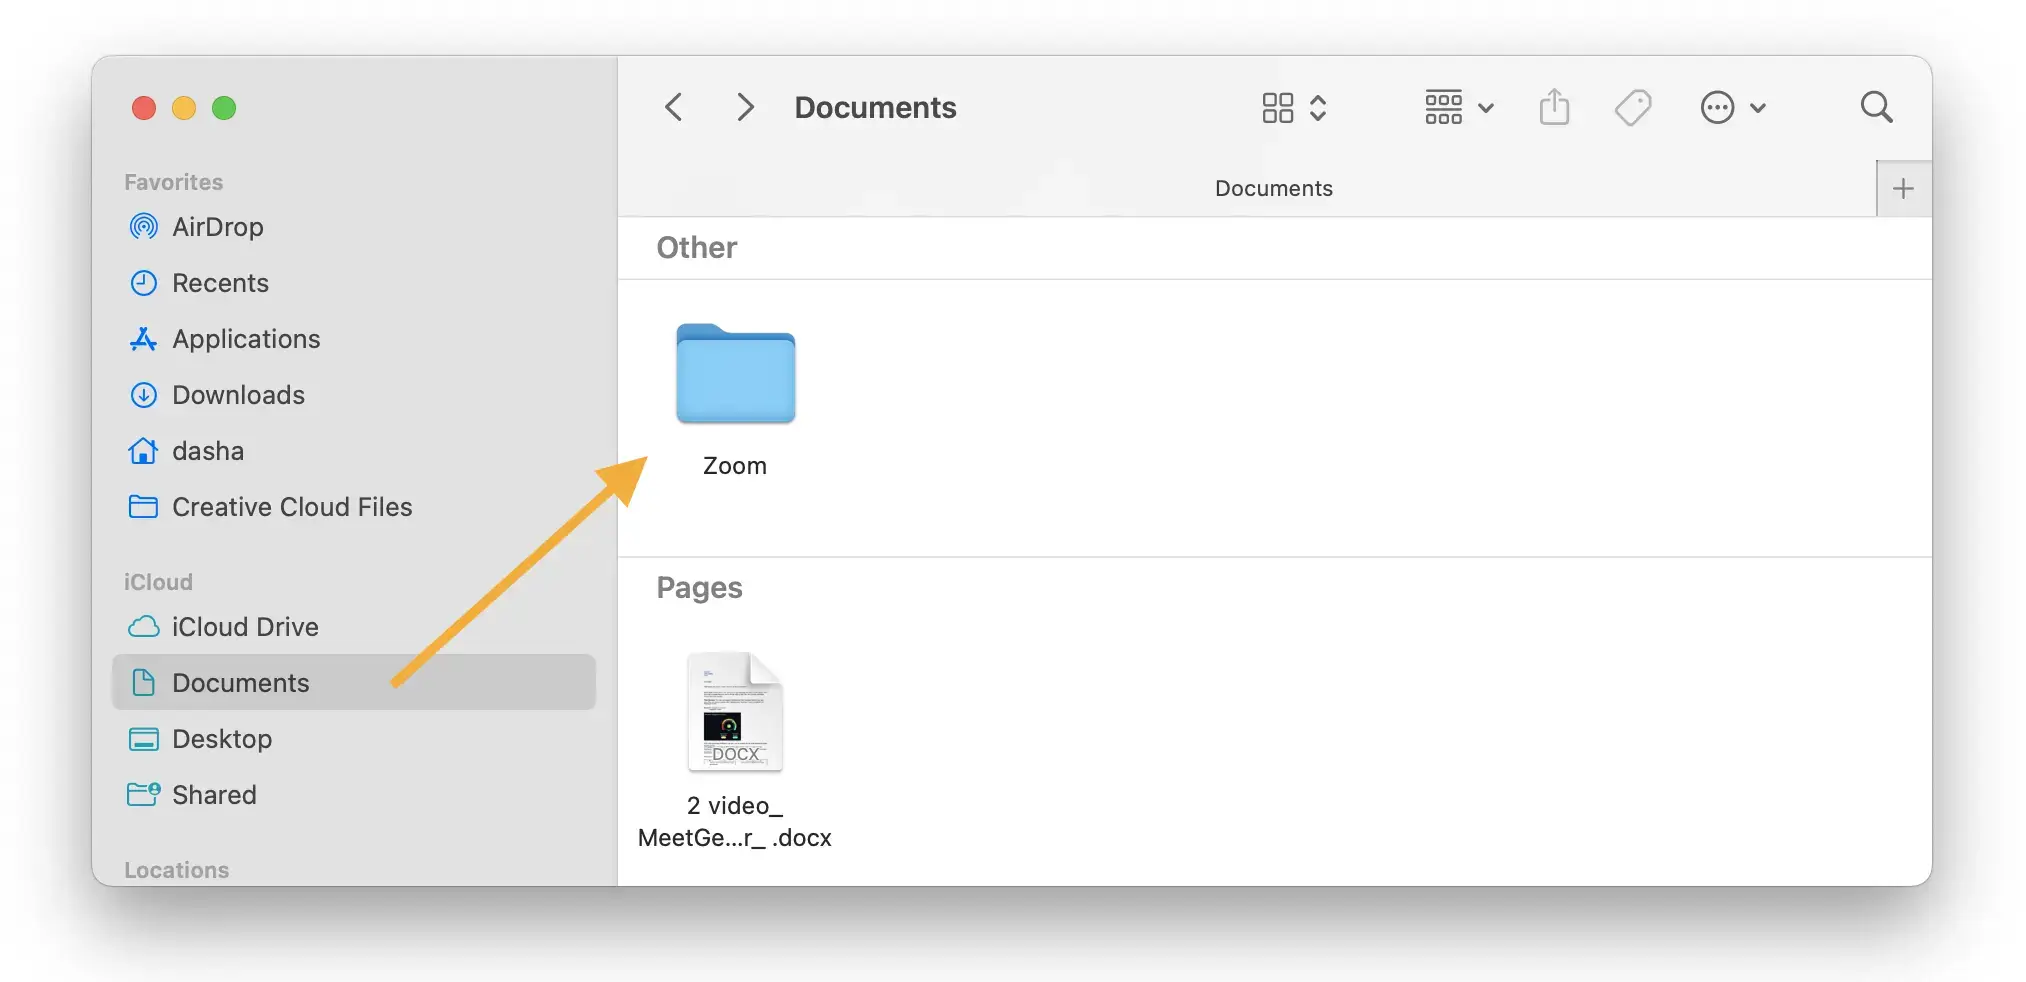
- Open your file management tool. On Windows, this is File Explorer, while Mac users will use Finder.
- Navigate to the Documents folder, where Zoom typically stores its recordings by default.
- Look for a folder named Zoom. Inside, you’ll find subfolders organized by meeting date, each containing video files, audio files, and chat transcripts for a specific meeting.
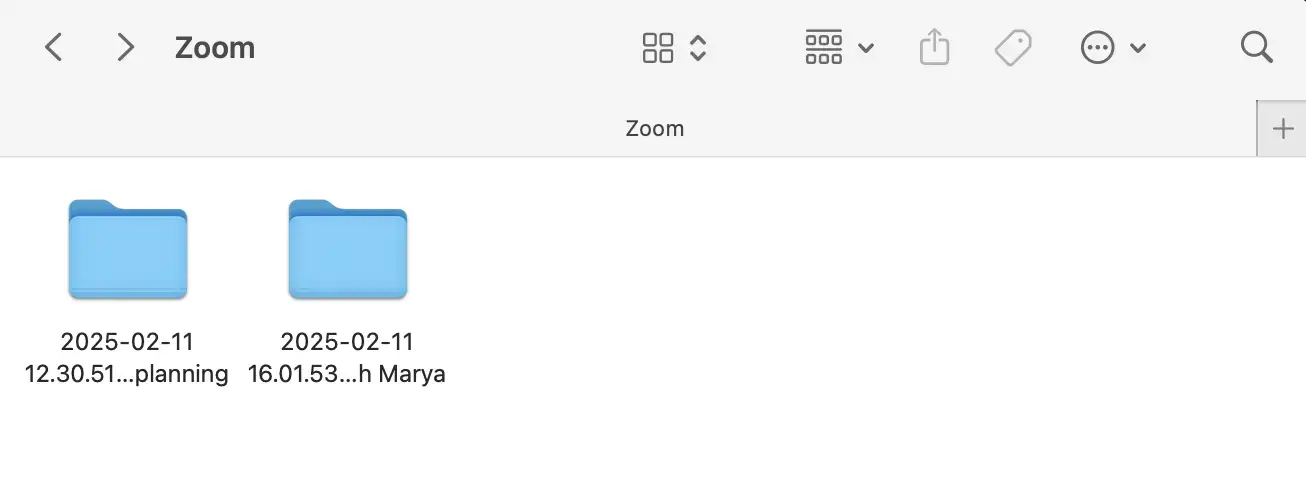
The Zoom folder is neatly organized, with each recording stored in a subfolder labeled by the meeting date and time. These subfolders include all related files, such as the MP4 video, M4A audio, and text chat logs, making it easy to find exactly what you need.
Pro Tip: If you’ve changed the default save location for your Zoom recordings, you’ll need to check that specific folder instead. This customization is a great way to keep your recordings organized in a way that fits your workflow.
How to Access Zoom Cloud Recordings
For paid Zoom users, cloud recordings offer unmatched convenience, allowing you to store meeting videos on Zoom’s servers and access them from anywhere. This is ideal for professionals who need to share recordings with remote teams or access them on the go, similar to how Microsoft Teams handles cloud-based recordings.
Steps to Find Zoom Cloud Recordings
- Visit Zoom.us and log into your Zoom account with your credentials.
- In the left-hand menu, click on Recordings & Transcripts to view your stored recordings.
- Under the Cloud Recordings section, you’ll see a list of all your recorded meetings, sorted by date. Each entry includes details like the meeting topic, duration, and file size, making it easy to locate the right recording. You can also filter by meeting ID, title, or date range for faster searches.

Cloud recordings are a powerful feature for remote teams and educators, ensuring your meeting content is always accessible and secure.
Accessing Zoom Recordings via the Zoom App
The Zoom desktop app provides a user-friendly way to access both local recordings and cloud recordings without needing to navigate through your browser or file system. This is perfect for busy professionals who want quick access to their meeting archives.
Steps to Find Recordings in the Zoom App
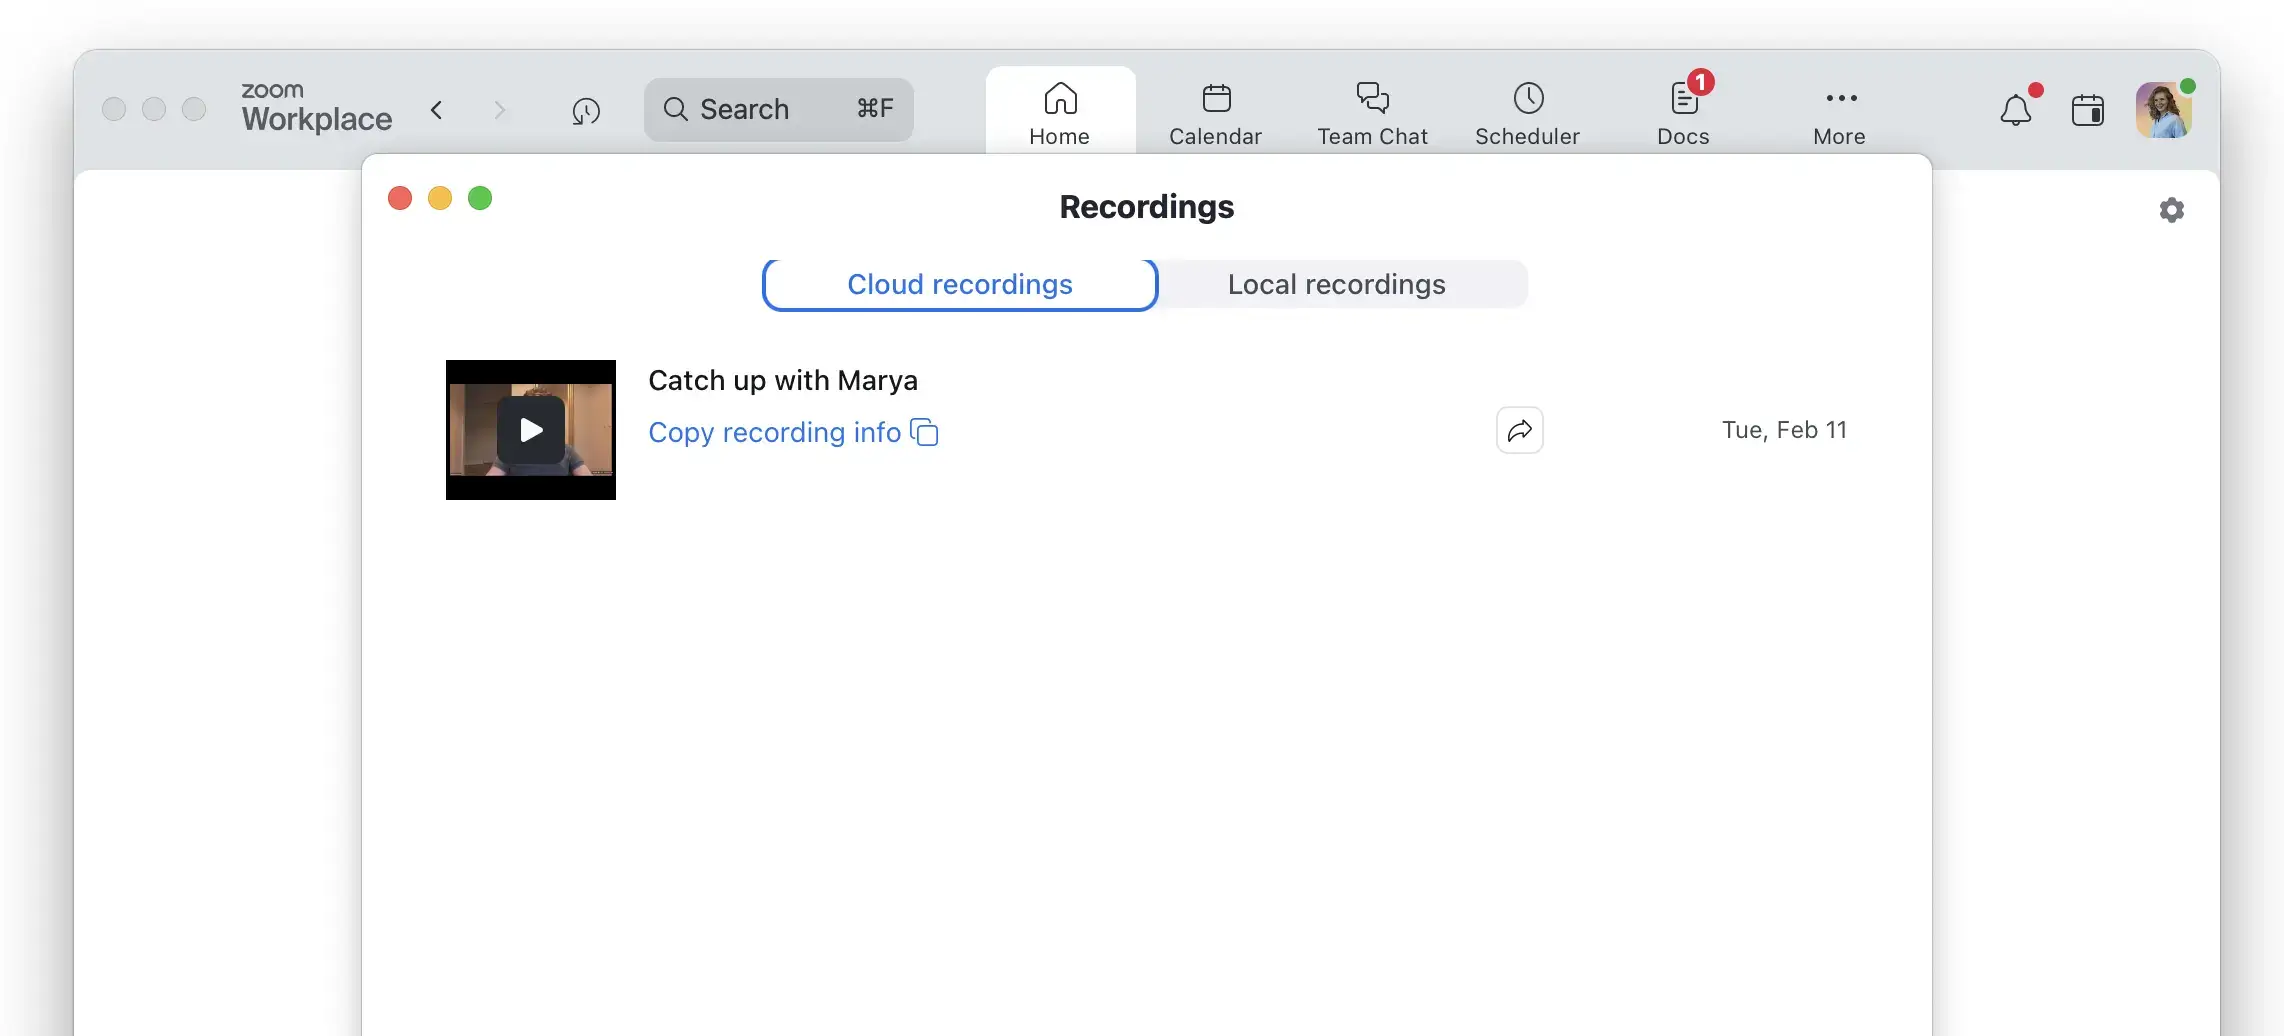
- Launch the Zoom app on your desktop and ensure you’re logged into your account.
- On the home screen, click Open Recordings to view your recording library.
- You’ll see two tabs: Cloud Recordings and Local Recordings. Switch between them to browse all your Zoom recordings effortlessly.

This method is especially convenient if you’re already using the Zoom app for virtual meetings and want to streamline your workflow.
Zoom meeting recordings are a valuable resource for reviewing discussions, sharing insights, and maintaining accurate records. Whether you’re revisiting a team brainstorming session or sharing a lecture with students, here’s how to play, share, and download your recordings effectively.
How to Play Zoom Meeting Recordings
Need to rewatch a Zoom meeting? Playing your recordings is simple, whether they’re stored locally or in the cloud.
- Local Recordings: Navigate to the Zoom folder on your computer, locate the recording file, and double-click it. The video will open in your default media player, such as VLC or Windows Media Player.
- Cloud Recordings: Log into your Zoom account, go to the Recordings section, and click Play next to the desired meeting. The video will stream directly in your browser.
Sharing Zoom recordings is a great way to keep team members or clients in the loop, especially for collaborative projects.
- Local Recordings: Upload the recording file to a cloud storage service like Google Drive or Dropbox, then share the link with others. For smaller files, you can attach them directly to an email.
- Cloud Recordings: In your Zoom account, go to the Recordings section, click Share next to the recording, and copy the shareable link. You can also set permissions to control who can view the video, ensuring security and privacy.
How to Download Zoom Meeting Recordings
Downloading Zoom recordings allows you to create backups or move files to other storage solutions for long-term access.
- Local Recordings: Since these are already on your computer, you can simply copy or move the recording files to another folder or external drive.
- Cloud Recordings: Log into your Zoom account, navigate to the Recordings section, and click Download next to the meeting you want to save. The video file will be saved to your computer automatically.
How to Change Your Zoom Recording Storage Location
If you’re using a paid Zoom plan, you can customize your recording settings to ensure recordings are saved exactly where you want them. This flexibility is a major advantage over other platforms like Google Meet, which may have more rigid storage options.
Steps to Customize Zoom Recording Settings
- Open the Zoom desktop app and log in with your account credentials.
- Click your profile picture in the top-right corner and select Settings from the dropdown menu.
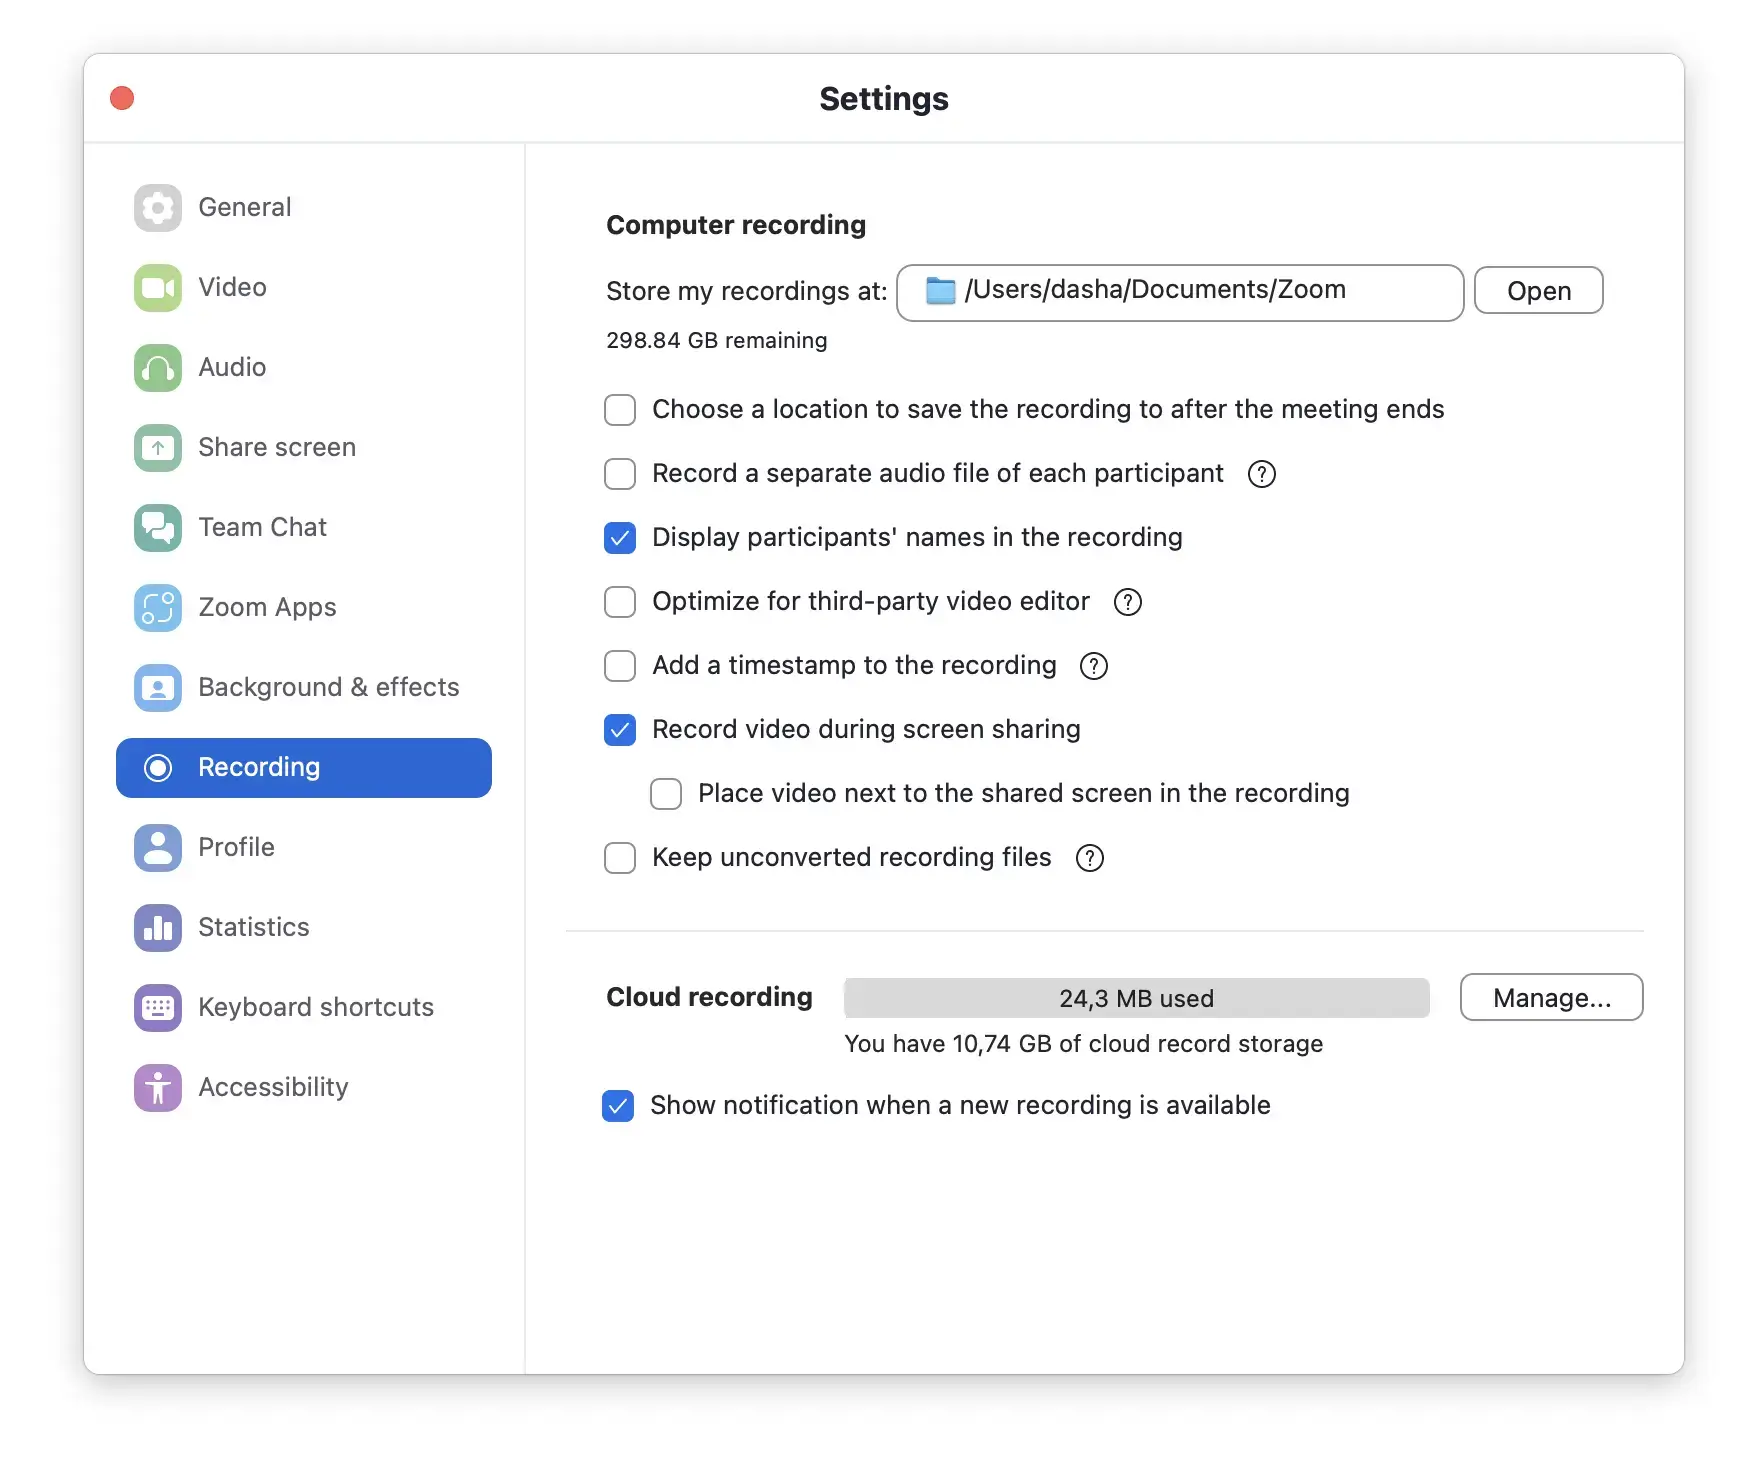
- In the Settings window, click Recording from the left-hand menu to access recording options.
- Under the Recording tab, you’ll see the current local storage location. Click Change to select a new folder on your computer if desired.
- Explore additional recording settings, such as:
- Separate audio files for each participant, ideal for podcasters or editors.
- Optimization for third-party video editors, perfect for creating professional videos.
- Adding a timestamp to recordings for better organization.
- Recording video during screen sharing to capture both the presenter and content.
- If you have cloud recording enabled, customize options like audio transcripts, screen sharing optimization, or participant video recording.
- Close the Settings window to save your changes automatically.
These customization options make Zoom a versatile tool for professionals and educators alike.
Automate Your Zoom Recordings with MeetGeek
Manually managing Zoom recordings can be time-consuming, especially if you’re juggling multiple meetings or lack the right subscription plan. Labeling, storing, and sharing recordings can quickly become overwhelming, particularly for busy teams.
Enter MeetGeek, a free AI meeting automation platform that simplifies the entire process. MeetGeek automatically joins Zoom meetings, records, transcribes, summarizes, and stores your meeting data in a centralized dashboard, ensuring everything is just a click away. If you’re already using Zoom’s cloud recording, you can sync your recordings with MeetGeek via Zapier for seamless integration.
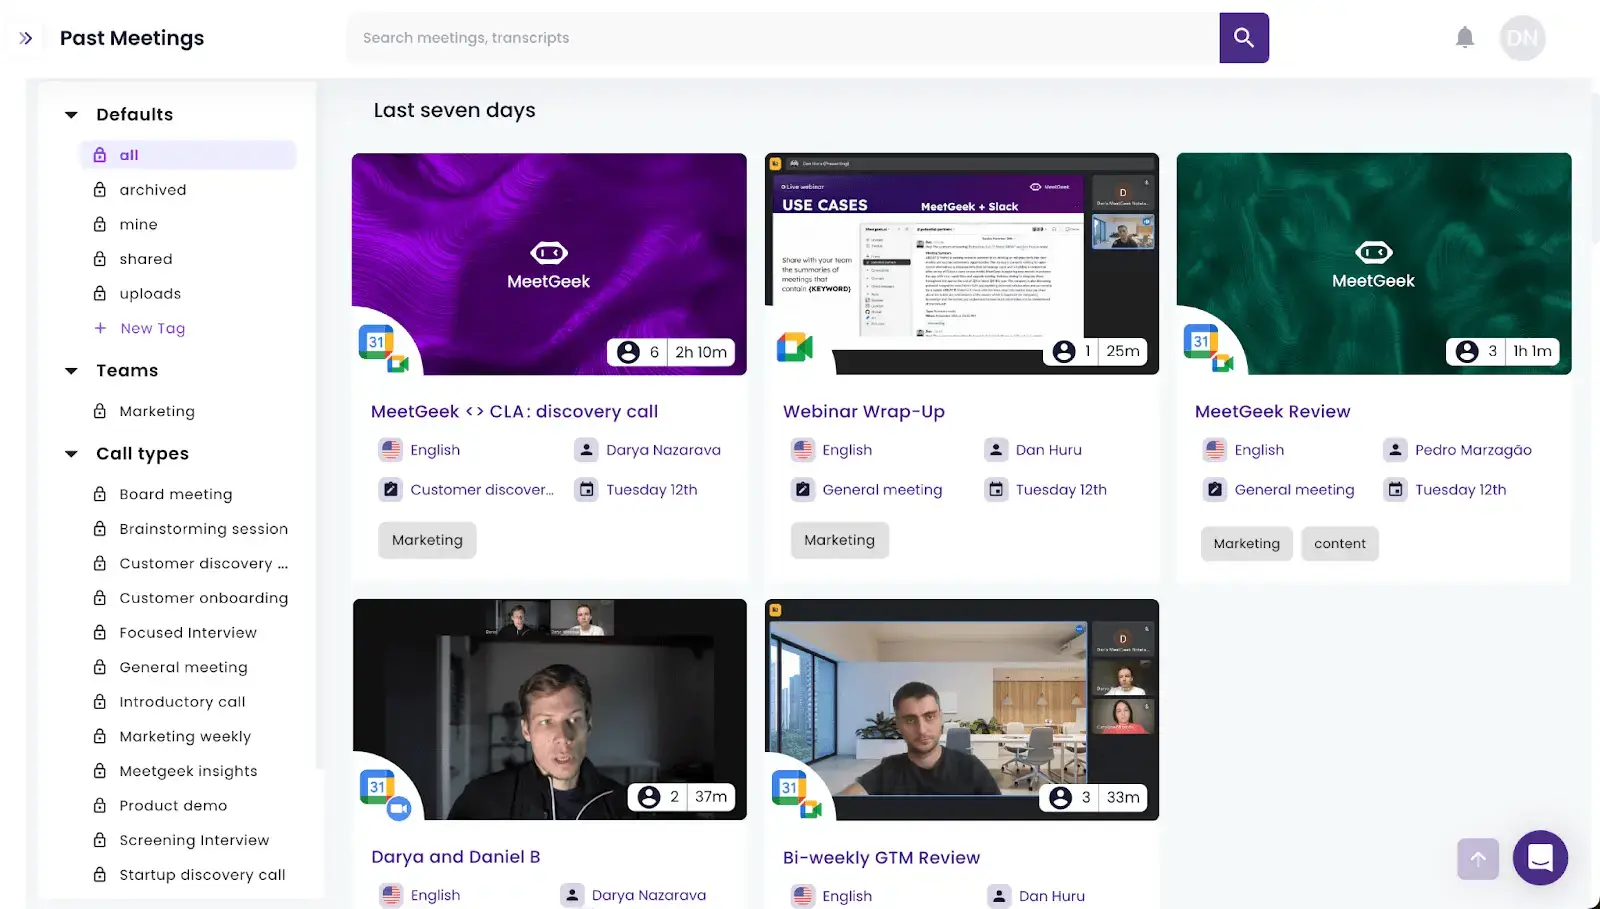
What MeetGeek Offers for Zoom Meetings
- Auto-Join Meetings: MeetGeek can join and record Zoom meetings on your behalf, even if you’re unavailable, ensuring no discussion is missed.
- Key Insights Extraction: Using AI technology, MeetGeek identifies action items and key points, saving you time when reviewing meetings.
- Shareable Summaries: Get concise meeting summaries that team members can quickly review without watching the full recording.
- Tool Integrations: MeetGeek connects with Slack, Notion, and other collaboration tools, making it easy to share recordings and summaries in your workspace.
- Searchable Transcripts: Find specific topics or discussions instantly with searchable transcripts, eliminating the need to scrub through videos.
- Centralized Library: Store all your recordings and transcripts in a searchable repository for easy access.
- Automated Follow-Ups: Let MeetGeek generate follow-up emails with meeting highlights to keep everyone on the same page.
- Mobile Access: Stay connected on the go with MeetGeek’s mobile app, perfect for remote workers or traveling professionals.
Zoom Recording FAQs
1. Why Can’t I Find My Zoom Recording?
If your Zoom recording isn’t showing up, here are some troubleshooting tips:
- Confirm you clicked the Record button during the meeting. Without this, no recording will be created.
- For cloud recordings, check if the recording has finished processing, as longer meetings may take time to appear.
- For local recordings, verify the default save location in the Zoom folder under Documents. If it’s still missing, try restarting Zoom or your computer.
2. Do Zoom Recordings Expire?
Zoom recordings don’t vanish automatically, but cloud storage limits can affect availability. With Zoom’s cloud storage, recordings are retained until you hit your storage cap. To prevent loss, download them to your computer or upgrade your cloud plan. Local recordings stay on your computer until you delete them.
3. What’s the Difference Between Cloud and Local Zoom Recordings?
- Cloud Recordings: Stored on Zoom’s servers, accessible anywhere with an internet connection, but only available to paid users.
- Local Recordings: Saved to your computer’s hard drive, accessible offline, and available to all Zoom users, though they require storage management.
Image source: studio4rt on Freepik