Enabling auto sign-in with a third party MDM in Zoom
There are several ways Zoom’s Mobile Device Management service (ZDM) can be used with devices. It can manage devices that are enrolled in a third-party MDM, or can be assigned to a specific Zoom Room. When the Zoom Rooms app is assigned, it will be automatically installed and signed in after you have been assigned.
The following topics are covered in this article:
- How to retrieve the activation code
- How to configure MDM
- General configuration instructions
- Configuring Auto Sign-in with AirWatch
- Configuring Auto Sign-in with Jamf
- Configuring Auto Sign-in with Intune
Contents
Prerequisites for enabling auto sign-in with a third party MDM
- In the case of a device that has been enrolled in a program for managing mobile devices
- A Zoom Rooms control app that is based on the iOS operating system
How to retrieve the activation code
- You will be able to access the Zoom web portal once you have logged in.
- You can access Zoom Rooms by clicking on Room Management in the navigation panel.
- In the rooms list, you can either click on + Add Room or find an existing room that you would like to add.
- If the room already exists, you can edit it by clicking the Edit button.
- Click on the Regenerate button under the Activation Code heading once you have found it.
- The Activation Code should be copied and saved to your computer.
How to configure MDM
General configuration instructions
- In order to activate your Zoom Room, you will need to retrieve the activation code.
- Please copy the Activation Code that appears on the screen.
- Make sure that you push the configuration via your Mobile Device Management program, which includes the following keys:
- If you are responsible for the Zoom Room Control or Scheduling Display, please push the following information:
- As the value, you should enter the activation code that you generated as the key “ActivationCode”
- A key “WorkMode” will be set, and depending on how this device is used, the value “controller”, “scheduling display“, or “zoom room” will be set.
- In order to push the following information to the Zoom Rooms computer, you need to push the following:
- Activ code is the key, and the value of the activ code is the key that you generated
- If you are responsible for the Zoom Room Control or Scheduling Display, please push the following information:
Configuring Auto-Sign in with AirWatch
- This is the code you will need to activate your Zoom Room.
- You will need to copy the activation code from the email you received.
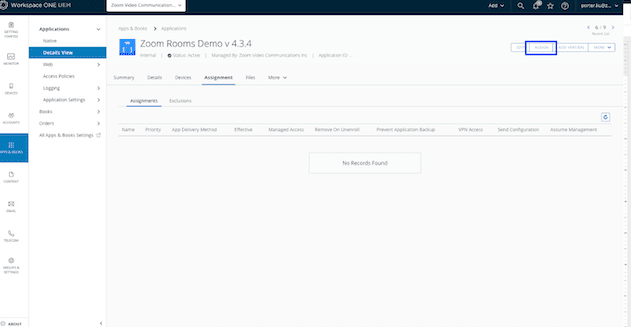
- Choose Zoom Rooms from the Apps & Books menu in AirWatch by going to the Apps & Books section.
- Click on the Details View to see more information about the item.
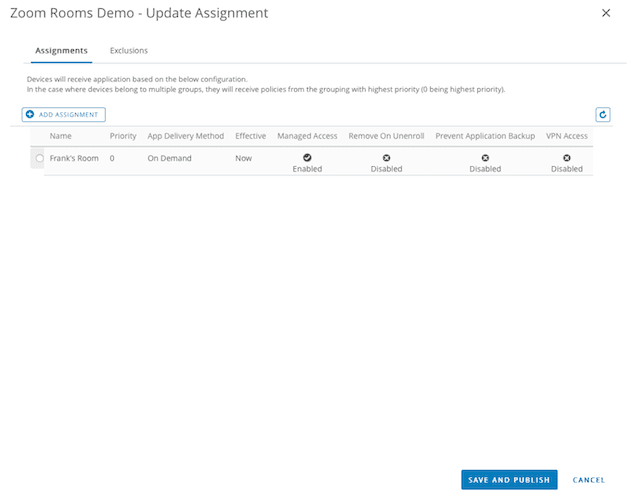
- Assign the task by clicking the Assign button.
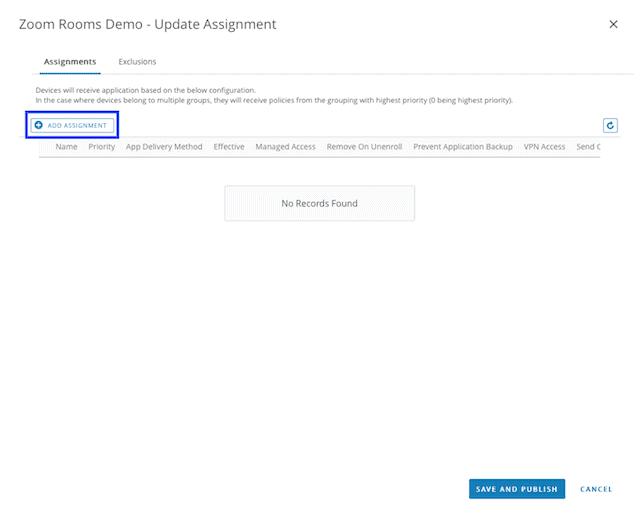
- To add an assignment, click the Add Assignment button.
- You can select assignment groups by selecting the Assignment Groups option.
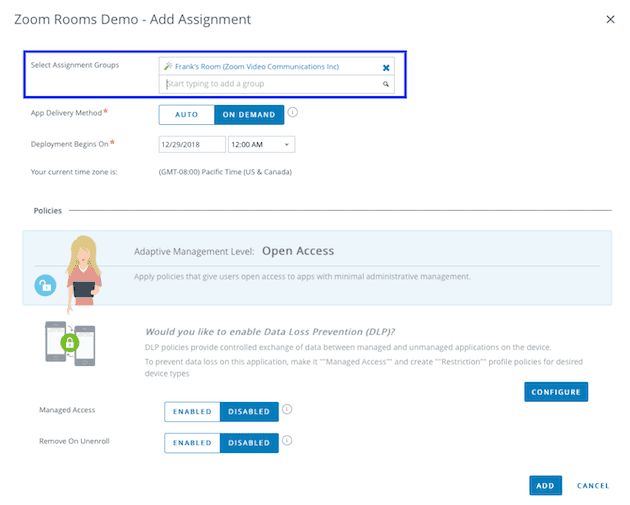
- Each group should contain only one iPad since AirWatch pushes the configuration across all iPads in the group and each iPad needs a unique activation code in order to function.
- If the Application Configuration option is enabled, enter the following values in the Values field:
Configuration Key Value Type Configuration Value ActivationCode String Zoom Room Activation Code WorkMode String “controller”, “scheduling display” or “zoom room” 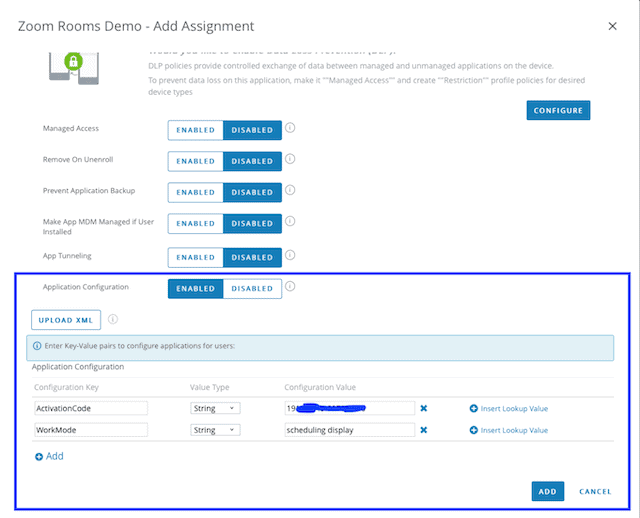
- Then click on the Add button.
- Publish the document by clicking the Save and Publish button.
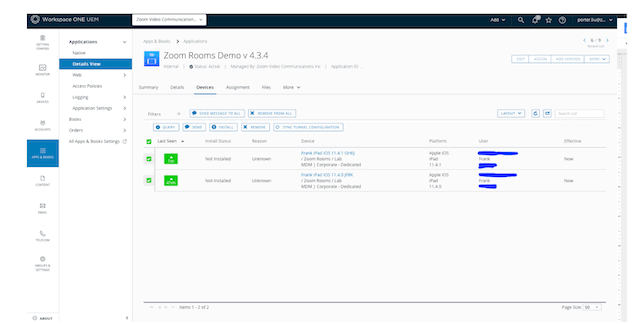
- You can select the devices you want to install the App on and click the Install button on the details view page.
Configuring Auto Sign-in with Jamf
- In order to activate Zoom Rooms, you must retrieve the activation code.
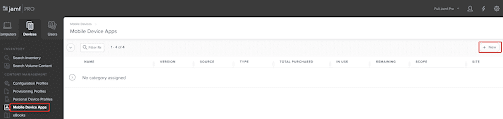
- Jamf can be opened by clicking the Mobile Device Apps tab, and then clicking on the New button.
- Select App Store apps or apps purchased as part of a volume purchase, then click Next to proceed.
- In the field labelled Search, enter zoom rooms and click on the Next button.
- Add a new item by clicking the Add button. Choose Install Automatically/Prompt Users to Install from the Distribution Method heading on the left of the screen.
- You can select a specific mobile device or specific user and click Add after you have selected Scope.
- Please select an iPad and click the “Add to Cart” button. Don’t forget to click on the Done button at the end.
- On the App Configuration page, you will need to enter the following information:
 <dict>
       <key>ActivationCode</key>
       <string>xxxxxxxxxxxxxxxx</string>
       <key>WorkMode</key>
       <string>xxxxxx</string>
 </dict>
Configuration Key Configuration Value ActivationCode Zoom Room Activation Code WorkMode “controller”, “scheduling display” or “zoom room” - Then click Save and then click Done to save the changes.

- You will find Zoom Rooms listed in the Mobile Device Apps section of the page.
Configuring in Intune
- In order to activate the Zoom Room, you will need to retrieve the activation code.
- Intune can be accessed by logging into the account.
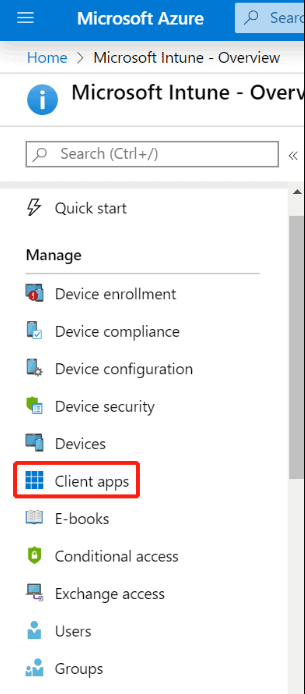
- The client apps can be found by clicking the Client apps button.
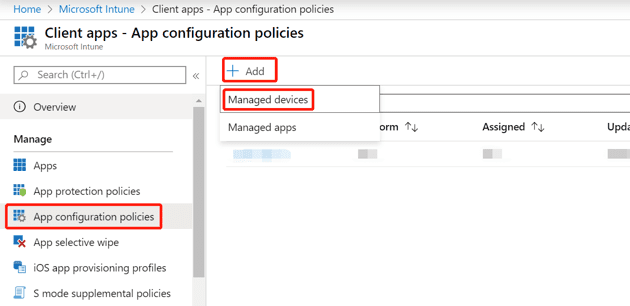
- Choose App configuration policies from the navigation panel on the left side of your screen.
- Choose Managed Devices from the Add a Device menu and click Add.
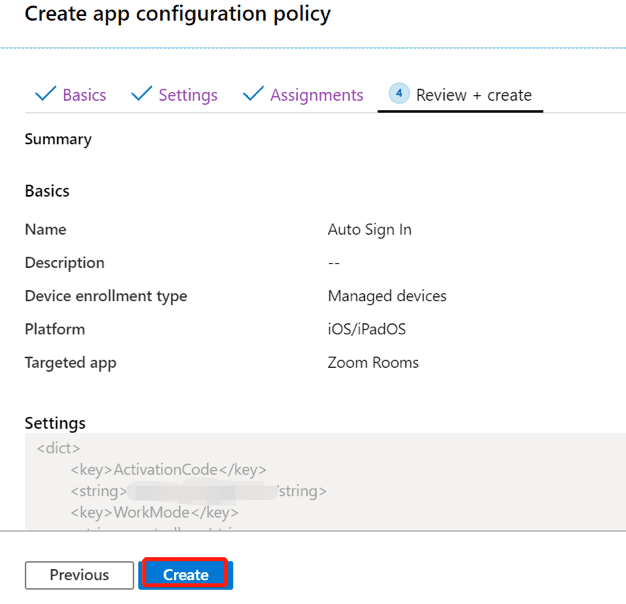
- If you are going to create a policy, go to the Basics tab and fill in the following information:
- It is important to give the policy a name as well as a description.
- This application runs on the iOS/iPadOS platform.
- I have selected Zoom Rooms as the target app for this campaign
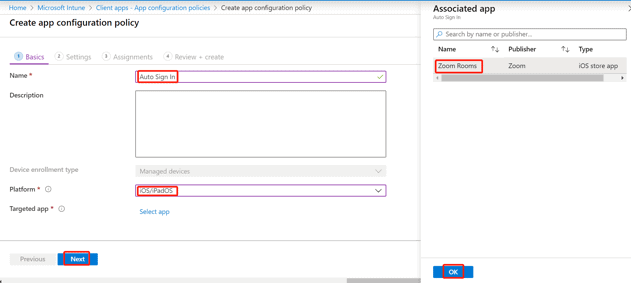
- Next, you will need to click on the next button.
- If you go to the Settings tab, you will find an option for Enter XML data under Configuration settings format.
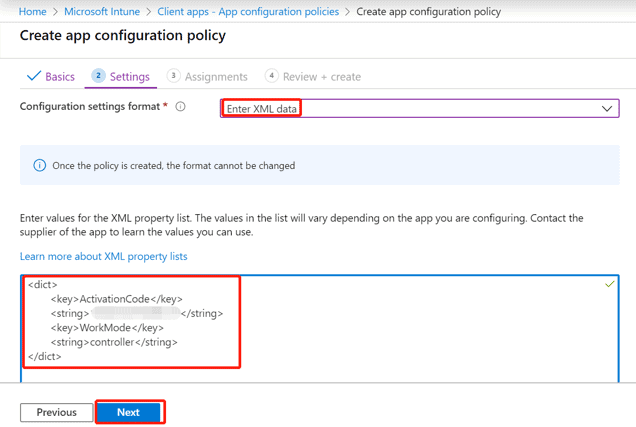
- To add an XML property to your document, you will need to enter the following in the box:
<dict>
      <key>ActivationCode</key>
      <string>xxxxxxxxxxxxxxxx</string>
      <key>WorkMode</key>
      <string>xxxxxxx</string>
</dict>
Configuration Key Configuration Value ActivationCode Zoom Room Activation Code WorkMode “controller”, “scheduling display” or “zoom room” - The next step is to click the Next button.
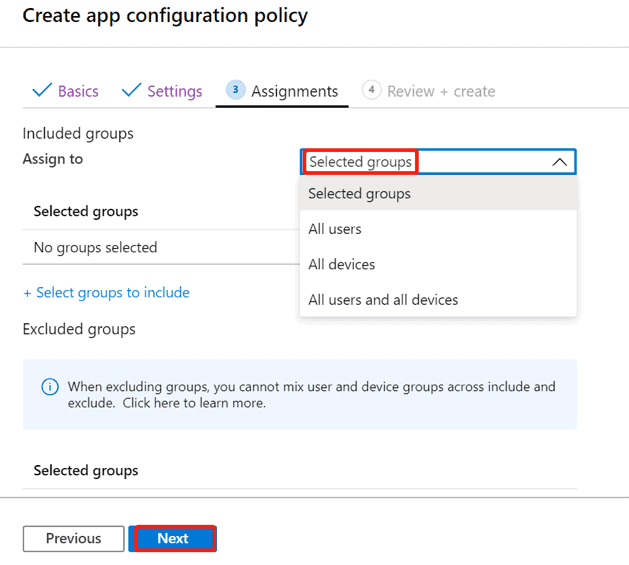
- The scope of the deployment can be selected under the Assignments tab under Assign to.
- Click on the Create option under the Review + Create tab