
How to Configure professional audio settings for Zoom Meetings
However, there is a chance that these audio filters will obstruct situations where the microphone needs to pick up the full range of sounds. To enhance the quality of the audio that your microphone receives by default, the Zoom client will use noise suppression and echo cancellation. When users find themselves in these circumstances, they have the ability to disengage these audio filters and boost their sample rates in order to enhance the sound quality of their meetings. This may include musicians using their instruments, people recording high-quality audio for podcasts, or medical experts who are making a diagnosis based on sound. For example, musicians could be using their instruments.
This article covers:
Contents
- 1 Prerequisites for adjusting audio settings
- 2 How to Configure professional audio settings for Zoom Meetings in windows or macOS
- 3 How to Configure professional audio settings for Zoom Meetings in Linux
- 4 How to Configure professional audio settings for Zoom Meetings in Android or iOS
- 5 How to Configure professional audio settings for Zoom Meetings in Zoom Web App
- 5.1 How to adjust background noise suppression for Zoom meetings
- 5.2 1. How can I improve audio quality in Zoom meetings?
- 5.3 2. What are the recommended microphones for Zoom?
- 5.4 3. How do I enable original audio in Zoom?
- 5.5 4. What is the difference between computer audio and original sound in Zoom?
- 5.6 5. How can I reduce background noise in Zoom?
- 5.7 6. What are the best practices for using headphones in Zoom?
- 5.8 7. How can I test my audio settings before a Zoom meeting?
- 5.9 8. What should I do if participants complain about my audio quality?
- 5.10 9. Can I use an audio interface with Zoom for professional recording?
- 5.11 10. How do I adjust individual participant audio in a Zoom meeting?
Prerequisites for adjusting audio settings
Background noise suppression, original sound, and high-fidelity music mode
- Ensure that the Zoom desktop client on Windows, macOS, or Linux is at the global minimum version or a newer release.
- The Zoom mobile app for Android or iOS should be at the global minimum version or a more recent one.
- For the Zoom Web App, use the latest version or a release that meets the global minimum requirements.
You should be aware that Linux only allows you to customize the amount of background noise reduction applied.
Live performance audio mode in Zoom
- Windows users are advised to use Zoom desktop client version 5.14.0 or higher, while macOS users should have version 5.14.0 or a more recent release.
- Ensure that the Zoom desktop client is enabled for all participants during meetings.
- It’s recommended to use an audio input device supporting a 48 kHz sample rate.
- Note that for optimal live performance audio, higher network requirements are necessary. Ethernet connections are recommended for the best performance.
How to Configure professional audio settings for Zoom Meetings in windows or macOS
How to adjust background noise suppression for Zoom meetings
By default, Zoom utilizes its standard optimized audio for handling microphone input. This involves incorporating some background noise suppression, designed to cater to a variety of situations. However, users have the option to customize the level of background noise suppression based on their specific environment. For example, individuals working in a noisy office might opt for higher noise suppression, while those in a quieter studio may find less noise suppression more suitable.
To make these adjustments:
- Log in to the Zoom desktop client.
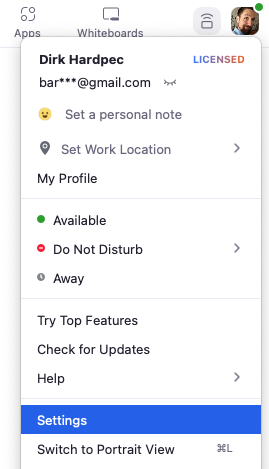
- Select your profile picture, then access Settings.
- Open the Audio tab by clicking on the audio-button.png.
- In the Audio Profile section, choose Zoom optimized audio.
- Different levels of Background Noise Suppression are available below.
- Choose the desired level of suppression:
- Auto: This default setting provides moderate background noise reduction as needed. It automatically adjusts aggressiveness based on detected background noise, recommended for most users and situations.
- Low: Offers minimal noise reduction, blocking low levels of persistent background noise. Suitable for casual music playback to preserve the original sound.
- Medium: Ideal for reducing and eliminating background noise in standard environments, including sounds like fans or pen tapping.
- High: The most aggressive setting, eliminating background noise such as others’ speech.
Note that enabling this may increase CPU utilization.
How to enable and configure original sound for musicians in Zoom
It is possible that deleting the audio filters and raising the quality of the audio codec may be essential and more beneficial in some circumstances, despite the fact that Zoom’s normal noise suppression is excellent for the majority of instances. The reason for this might be because you are utilizing a microphone of higher quality that comes equipped with built-in audio filters, or it could simply be that you wish to record the complete spectrum of sounds generated by your instrument.
- Log in to the Zoom desktop client.
- Click on your profile picture and navigate to Settings.
- Open the Audio tab by selecting audio-button.png.
- In the Audio Profile section, opt for Original Sound for musicians.
- Further audio options are presented below.
- Choose the audio settings according to your preferences.
- High-fidelity music mode: Disables echo cancellation and post-processing, enhancing audio codec quality to 48KHz, 96Kbps mono/192Kbps stereo. Professional audio interface, microphone, and headphones are necessary.
- Echo cancellation: Prevents the occurrence of echoes between the microphone and speakers. Disable only when using headphones to isolate audio or when playing musical instruments.
- Stereo audio: Encodes microphone audio in stereo, requiring a stereo-capable microphone or audio interface.
How to enable and configure live performance audio mode in Zoom
When engaging in live music performances in collaboration with others during a meeting, maintaining precise timing and harmony with fellow musicians is crucial. The live performance music mode is designed to minimize audio latency between all participants to approximately 30-50 ms.
Note: It’s important to be aware that employing this particular audio setting comes with higher requirements compared to other settings.
- Log in to the Zoom desktop client.
- Select Settings by clicking on your profile picture.
- Navigate to the Audio tab by choosing audio-button.png.
- In the Audio Profile section, opt for Live performance audio.
- This audio profile is accessible during live meetings.
- Once activated in Settings, you can toggle it on and off as required during live meetings.
How to Configure professional audio settings for Zoom Meetings in Linux
How to adjust background noise suppression for Zoom meetings
By default, Zoom employs its standard optimized audio for handling microphone input. This involves built-in background noise suppression, generally suitable for various scenarios. However, users have the flexibility to customize the level of background noise suppression based on their specific needs. For instance, a loud office environment might benefit from higher noise suppression, while a solo recording may require less.
- Log in to the Zoom desktop client.
- Access Settings by clicking on your profile picture.
- Navigate to the Audio tab by selecting audio-button.png.
- Locate the Suppress background noise option and click the dropdown menu to choose your preferred level of suppression:
- Auto: This is the default setting, providing moderate background noise reduction as needed. It dynamically adjusts aggressiveness based on detected background noise, excluding music.
- Low: Offers minimal noise reduction, blocking low levels of persistent background noise. Ideal for casual music playback, preserving the original sound.
- Medium: Optimal for reducing and eliminating background noise in standard environments, such as fans or pen tapping.
- High: The most aggressive setting, eliminating noises like crunching paper, wrappers, or keyboard typing. Note that enabling this may increase CPU utilization.
How to Configure professional audio settings for Zoom Meetings in Android or iOS
How to enable original sound
Although Zoom’s standard noise suppression is effective in many scenarios, there may be instances where disabling audio filters and enhancing the audio codec quality become necessary and more beneficial. Before activating this feature during a Zoom meeting, ensure that you have enabled it through the settings within the Zoom mobile app.
- Log in to the Zoom mobile app.
- Tap “More” in the bottom-right corner.
- Navigate to Meetings under Settings.
- In the Audio section, toggle the switch next to “Use Original Audio.”
- Once activated in settings, you can toggle it on and off as required during live meetings.
How to Configure professional audio settings for Zoom Meetings in Zoom Web App
How to adjust background noise suppression for Zoom meetings
By default, Zoom applies its standard optimized audio for mic audio processing, incorporating background noise suppression ideal for various scenarios. However, it’s important to note that, unlike the desktop client, the Zoom Web App version supports only full on/off options for background noise suppression.
To manage this setting:
- Join a meeting or webinar using the Zoom Web App or web client.
- In the control toolbar, click on Settings.
- Navigate to the Audio tab by selecting audio-button.png.
- Within the Audio Profile section, choose Zoom-optimized audio.
- Opt for On or Off to enable or disable background noise suppression as needed.
1. How can I improve audio quality in Zoom meetings?
- Use an external microphone for better clarity.
- Choose a quiet location to reduce background noise.
- Enable original audio for higher fidelity.
2. What are the recommended microphones for Zoom?
- USB microphones like Blue Yeti or Audio-Technica ATR2100x.
- Headset microphones for personal use.
- Lavalier microphones for mobility.
3. How do I enable original audio in Zoom?
- Go to Zoom settings.
- In the Audio settings, find “Advanced” options.
- Enable “Show in-meeting option to ‘Enable Original Sound.'”
4. What is the difference between computer audio and original sound in Zoom?
- Computer audio may apply noise cancellation and compression.
- Original sound preserves the quality without processing.
5. How can I reduce background noise in Zoom?
- Use headphones to minimize external sounds.
- Enable noise suppression in Zoom settings.
- Choose a quiet environment for your meetings.
6. What are the best practices for using headphones in Zoom?
- Use over-ear headphones for better sound isolation.
- Check for comfortable fit to avoid discomfort during long meetings.
7. How can I test my audio settings before a Zoom meeting?
- Join a Zoom test meeting to check your audio.
- Use the Zoom audio settings to test your microphone and speakers.
8. What should I do if participants complain about my audio quality?
- Check your internet connection.
- Use an external microphone for better quality.
- Adjust your Zoom audio settings for optimal performance.
9. Can I use an audio interface with Zoom for professional recording?
- Yes, select the audio interface as your microphone in Zoom settings.
- Ensure the interface is properly connected and recognized by your computer.
10. How do I adjust individual participant audio in a Zoom meeting?
- Hover over the participant’s name in the participants’ list.
- Click on “More” and select “Adjust Audio Options.”
- Adjust the individual’s audio settings as needed.


