
Zoom Webinar templates
The settings for a webinar can be saved as a template that can be used later on when scheduling future webinars by copying the settings from the previous webinar. Among the basic settings you can choose are whether to have a Q&A section on the site, or if you wish to disable it. There are also more advanced settings, such as whether to include answers and questions to a poll. As part of the template, you will also be able to save the recurrence schedule for recurring webinars so that you can update it as needed.
You can save a webinar as a template and use that template to create a webinar with similar settings in the future whenever you want to create another webinar. There is a limit of 20 webinar templates that you can save.
The following topics will be covered in this article:
- Creating a webinar template
- Scheduling a webinar from a template
- Managing templates
Contents
Prerequisites
- It is required that you are a licensed user of Zoom Webinars (500, 1000, 3000, 5000, 10,000, or 50000) to take part in webinars.
Creating a webinar template
A webinar template is created by configuring a webinar and saving it with the settings that you need. Once that webinar has been configured, you save it as a webinar template. Creating a webinar template is as simple as following these steps:
- Sign into the Zoom web portal by entering your email address and password.
- Select Webinars from the drop-down menu.
- You can schedule a webinar by clicking on the Schedule a Webinar button.

- Depending on your preferences, you can choose the kind of settings that should be applied to the template.
-
- Schedule For: There is a drop-down menu that allows you to choose an individual from the drop-down list if you have scheduling privileges for another user that you are scheduling for. It is also necessary for the user to have a Licensed account as well as a webinar license that can be added on. Find out what scheduling privileges are and how they work.
- Topic: For your webinar, you will need to choose a topic or name.
- Description: On the registration page, you will have the option to enter a description for your webinar. This will appear on your registration page.
- When: Your webinar will start at the time and date that you have selected.
- Duration: If you would like your webinar to last approximately 30 minutes, choose that duration. There will be no end to the webinar for the duration of this time frame, and this is simply for the purpose of scheduling the webinar.
- Time Zone: In Zoom, you can set your own time zone in your profile, which will be used by default if you haven’t changed it. Changing the time zone can be done by selecting a different time zone from the drop down menu.
- The following webinars will be repeated on a regular basis: In order to have a recurring webinar, you would need to check if you would be interested in a meeting ID that must remain the same for all sessions. As a result, you will be able to choose from a variety of recurrence options:
- Recurrence: In the Recurring Webinars section, there are four options available: Daily, Weekly, Monthly, and No Fixed Time for the webinar to recur. The number of unique sessions that can be included in a recurring webinar is up to fifty. There is no restriction on how many recurrences you may make. However, you are not able to use registration with No Fixed Time if you need to make more than 50 recurrences.
- Depending on how often the meeting recurs, there are different options for recurrence. The recurring webinar can be set up to end after a set amount of occurrences or on a specific date based on how many times it has been aired. Schedule recurring webinars by clicking here to learn more about how to do so.
- List this Webinar in the Public Event List: To include this webinar in the list of public events in your account, ensure that your account has the Public Event List feature enabled.
- Registration: It is possible to require registration by checking this box.
- Webinar Passcode: Here you can edit the required passcode in order to help your participants join your webinar if you require them to enter a code to take part. In the case that participants decide to join manually, the passcode will be required to be entered before they can join your webinar. If they join by clicking a link in the registration confirmation email, they will not be required to enter the passcode; it will be included in the registration confirmation email and will be included in the confirmation email.
- Video: It is possible to enable or disable video during the webinar by selecting the appropriate option.
- Host: The host’s video can be turned on or off when you join the webinar by selecting whether you want the host’s video to be shown. It is not necessary to turn on the video because the host has the option to start the video even if you turn it off.
- Panelist: When you join the webinar, you will have the option to turn on or off the participants’ videos. There will be no capability for panelists to activate their video if you choose off during the webinar, and this can only be done if you allow it.
- Audio Options: You may configure your account so that users can call in by telephone, computer audio, both telephone and computer audio, or third party audio (if your account allows third party audio).
- Note: You will need to set up the account-level option Allow webinar attendees to dial in through the above numbers in order for telephone options to display for attendees.
- Webinar Options: There are other options available for webinars as well.
- Q&A: Depending on whether you wish to use a question and answer panel in your webinar, you will need to check this box. You can find out more by clicking here.
- Enable Practice Session: Instead of a live session starting in the middle of the webinar, you can choose to start it in a practice session first. Check out the practice session page for more information.
- Screen sharing with HD video should be enabled
- Attendees should be able to watch HD video during the session
- Require authentication to join: The webinar can be restricted to only registered users, so that they are able to participate in the meeting.
- Note: It is not possible to add any domains included on the domain block list if you select Sign in to Zoom with specified domain, if the domain block list is enabled.
- Identify the viewing participant with the help of a watermark
- If you wish to unmute panelists, you will need to request permission from them: It gives webinar panelists the option of approving the host’s request to unmute them by requesting pre-approval from them, before the event happens.
- Make the webinar on-demand: In this way, all of the registrants will receive a link to a link that will allow them to access the recorded webinar.
- Automate the recording of the webinar by following these steps: You can check this option if you would like the webinar to be recorded automatically. In this step, you can choose whether to record the webinar locally (requires the host to connect to a desktop computer to participate) or in the cloud through Zoom.
- This webinar can be enabled for additional regions in terms of data centers: The host can specify other data centers for the attendees of this webinar to connect to based on the data centers the host chooses. Having a data center that is local to attendees can be an advantage when they will join from a region that is different from the host, allowing them to connect more easily to a local data center when they will be joining from a different region.
- A user from a particular region or country can be approved or denied entry to the website: Participants can either be allowed to join only if they live in a particular county or region, or if they are blocked from joining if their county or region does not meet certain criteria.
- Alternative Hosts: It is possible to allow a Zoom user on your account who is licensed to run the webinar on your behalf by entering the email address of that user on your account. Check out the alternative host page for more information.
- Enable language interpretation: During a Zoom session or on the web portal, the host can make sure the option is available for participants to designate themselves as interpreters.
-
- You will then be able to schedule the appointment.
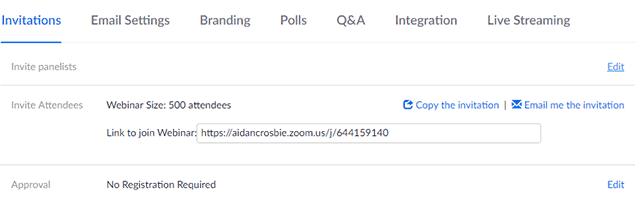
- In the set of tabs located on the left side of the screen, you will find tabs for Invitations, Email Settings, Branding, Polls, and Integrations.
- The settings you would like to apply to your template can be modified and saved as much as you would like.
- Click on the Save as a Template option near the options to Start this Webinar and Edit this Webinar.
- Click on the Save as Template button after naming this template, and then specify the name for this template.

Scheduling a webinar from a template
It is possible to schedule a new webinar using all the settings from one or more webinar templates that you have saved after creating one or more templates. Using a template to create a webinar, you will not be able to specify specific dates. Using an existing webinar template as a basis for scheduling a webinar is as follows:
- The Zoom web portal can be accessed by logging in to your account.
- Choose Webinars from the drop-down menu.
- You can schedule a webinar by clicking the Schedule a Webinar link.
- From the Use a template menu, you can choose a template that you have previously saved.

As soon as the new webinar is created, the advanced settings are copied from the template and applied to the new webinar. - If you saved this information in the template, make sure that you update the name and description of the webinar (if necessary), as well as the date and time information if needed.
- Click on Save Webinar once you have made any changes to the settings.
Managing templates
It is possible to view or delete one or more webinar templates from the Webinar Templates tab if you have one or more webinar templates. Templates can be saved in as many as 20 different ways.
- The Zoom web portal can be accessed by logging in.
- Choose Webinars from the drop-down menu.
- Select the Webinar Templates tab on the left side of the screen.
- You can view your saved webinar templates on this page, delete a template from your list, or start scheduling a webinar using a specific template by selecting a button on this page.
If your needs and experiences change over time, you can also adjust a saved template as your needs and experiences change. A template can be edited by following the steps below:
- To edit a template, select its name from the list of templates.
- You can edit this webinar template by clicking on the Edit button.
- In the template you will be able to adjust the options that you have stored.
- Save the file by clicking on the Save button.
Read it also –


